 Pin It
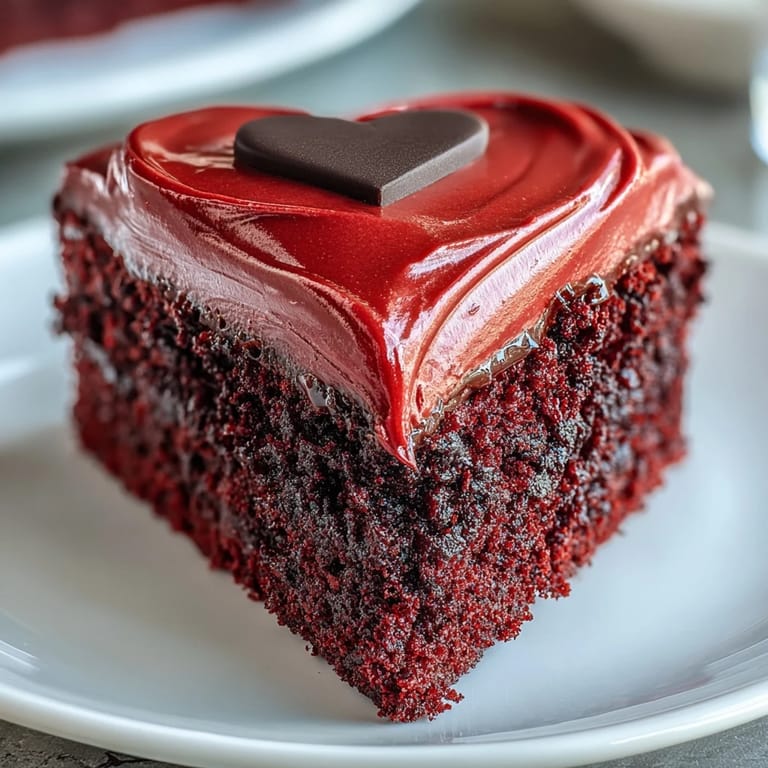
 My neighbor once knocked on my door holding a heart-shaped pan and asked if I knew what to do with it. She'd bought it on impulse, used it once for brownies, and it had been gathering dust ever since. I told her I'd try something bold, something that didn't apologize for being theatrical. That weekend, I made this cake: vivid red layers, tangy frosting, and a dark chocolate Betty Boop silhouette perched right in the center like a vintage pin-up on velvet. It was unapologetically fun, and she loved it so much she forgot to ask for her pan back.
I made this cake for a friend's birthday dinner, and when I walked in with it, the whole table went quiet. The dark chocolate silhouette caught the candlelight, and for a moment, everyone just stared. Then someone laughed and said it looked like Betty had jumped straight out of an old cartoon reel and landed on a Valentine. We cut into it with a warm knife, and the layers stayed neat, the frosting held its shape, and every bite had that perfect balance of soft cake and creamy tang.
Ingredients
- Cake flour: Sifted and light, it gives the crumb a delicate texture that doesn't turn dense or heavy even with all that moisture.
- Natural unsweetened cocoa powder: Just enough to deepen the color and add a whisper of chocolate without overpowering the red velvet character.
- Buttermilk: The acid tenderizes the crumb and gives the cake that signature tangy backbone.
- Red gel food coloring: Gel keeps the batter consistency intact while delivering that vivid, unapologetic red.
- White vinegar: It reacts with baking soda to create tiny air pockets, making the cake light and soft.
- Cream cheese: Room temperature is non-negotiable, it whips smooth and tangy without any lumps.
- Dark chocolate or candy melts: Melted and piped, it hardens into a crisp silhouette that snaps cleanly when you bite through it.
Tired of Takeout? 🥡
Get 10 meals you can make faster than delivery arrives. Seriously.
One email. No spam. Unsubscribe anytime.
Instructions
- Prep the Pans:
- Preheat your oven to 350°F (175°C) and grease two heart-shaped pans generously, then line the bottoms with parchment so the cakes release cleanly. This step prevents heartbreak later when you're trying to flip them out.
- Mix the Dry Ingredients:
- Whisk together the sifted cake flour, cocoa powder, baking powder, baking soda, and sea salt in a medium bowl. Set it aside while you work on the butter and sugar.
- Cream Butter and Sugar:
- Beat the room-temperature butter in a stand mixer for about a minute until creamy, then gradually add sugar and beat for 2 to 3 minutes until the mixture is light, fluffy, and pale. This is where the cake gets its tender structure.
- Add Eggs and Color:
- Add eggs one at a time on low speed, scraping down the bowl after each addition. Stir in the red gel coloring, vanilla extract, and white vinegar until the batter is evenly vivid and glossy.
- Alternate Dry and Wet:
- With the mixer on low, add one-third of the dry ingredients, then half the buttermilk, mixing just until incorporated. Repeat with another third of dry, the remaining buttermilk, and finish with the last third of dry ingredients without overworking the batter.
- Activate the Lift:
- In a small cup, combine 1 teaspoon vinegar with the baking soda, then gently fold the foaming mixture into the batter. This reaction creates a light, airy crumb that makes the cake feel almost cloud-like.
- Bake the Hearts:
- Divide the batter evenly between the prepared pans, smooth the tops with an offset spatula, and bake on the center rack for 25 to 30 minutes. A toothpick inserted in the center should come out clean, and the edges should pull away slightly from the pan.
- Cool Completely:
- Let the cakes cool in their pans for 10 minutes, then run a thin knife around the edges and invert them onto wire racks. Peel off the parchment and let them cool completely before you even think about frosting.
- Whip the Frosting:
- Beat the room-temperature cream cheese and butter together for 2 minutes until smooth and fluffy. Gradually add sifted powdered sugar, a pinch of salt, and vanilla extract, beating on low until the frosting is light and holds soft peaks.
- Assemble and Crumb Coat:
- Level the cake domes with a serrated knife if needed, then place one heart layer on a cake board. Pipe or spread about three-quarters of a cup of frosting over the top, add the second layer, and press gently. Apply a thin crumb coat over the entire cake, then chill for 10 minutes to seal in any loose crumbs.
- Final Frosting Layer:
- Add a smooth, generous layer of frosting over the chilled crumb coat. Use an offset spatula to create swirls or leave it smooth, depending on your mood.
- Pipe the Silhouette:
- Place your printed Betty Boop stencil under a sheet of parchment paper. Pipe or brush melted dark chocolate over the outline, then let it set at room temperature or in the fridge for 10 minutes until firm and glossy.
- Add the Decoration:
- Carefully peel the chocolate silhouette from the parchment and lift it onto the center of the frosted cake. Press gently so it adheres without sinking into the frosting.
- Finishing Touches:
- Decorate the edges with frosting rosettes, edible glitter, or red sugar pearls if you like. Chill the cake for 30 minutes to let the frosting set, then slice with a warm, clean knife for neat, picture-perfect hearts.
 Pin It
 The first time I served this cake, a friend who usually skips dessert asked for a second slice. She said the frosting tasted like cheesecake and the cake reminded her of something her grandmother used to make, but cooler. That's when I realized this recipe isn't just about nostalgia, it's about giving people permission to enjoy something playful and a little over the top. It's the kind of cake that makes you smile before you even taste it.
Choosing Your Chocolate
Dark chocolate gives the silhouette a bittersweet snap that contrasts beautifully with the sweet frosting, but candy melts are easier to work with if you're nervous about tempering. I've tried both, and honestly, the dark chocolate tastes better, but candy melts set faster and are more forgiving if your kitchen is warm. If you want a brighter contrast, use white chocolate and tint it black with oil-based coloring, it looks striking against the red and holds up just as well.
Getting the Frosting Just Right
Cream cheese frosting can go from fluffy to soupy in seconds if your butter or cream cheese is too warm. I learned this the hard way when I tried to rush it by microwaving the butter for a few seconds, the frosting split and I had to start over. Now I leave both out on the counter for about an hour before I start, and I beat them together until they're completely smooth before adding any sugar. If your frosting does turn too soft, pop it in the fridge for 10 minutes and whip it again, it usually comes back.
Making the Silhouette
The Betty Boop silhouette is easier than it looks, but you need a steady hand and a little patience. I print the stencil at the right size, tape it to my counter, and lay parchment over it so I can see the outline clearly. Then I melt the chocolate, let it cool just slightly so it doesn't pool too thin, and pipe it carefully along the lines. If you mess up, scrape it off and start again, the parchment is forgiving.
- Let the chocolate set completely before peeling it off, or it will crack.
- If the silhouette breaks, use a little melted chocolate as glue to piece it back together.
- Store extra silhouettes in the fridge between sheets of parchment, they keep for weeks.
 Pin It
 This cake always feels like a celebration, even on a random Tuesday. It's bold, playful, and just sweet enough to remind you that dessert doesn't have to be serious to be memorable.
Recipe Questions & Answers
- → How do I achieve the vibrant red color without altering batter consistency?
Use gel-based food coloring instead of liquid varieties. Gel coloring provides intense pigment with minimal liquid, preserving the batter's hydration and texture. Start with a small amount and gradually add until you reach your desired shade.
- → Can I make the chocolate silhouette decoration in advance?
Absolutely. Prepare the dark chocolate silhouette up to 3 days ahead and store flat between parchment paper in an airtight container at room temperature. Keep away from heat and humidity to prevent melting or blooming. Gently place onto the frosted cake just before serving.
- → What's the best way to achieve smooth frosting on heart-shaped layers?
Apply a thin crumb coat first and refrigerate for 10-15 minutes to set. This foundation catches loose crumbs and creates a stable base for the final layer. Use a warm offset spatula dipped in hot water and wiped dry to achieve ultra-smooth finishes or decorative swirls.
- → Can I substitute the cream cheese frosting with another variety?
While cream cheese frosting provides the classic tangy complement to red velvet, you could use Swiss meringue buttercream for a lighter texture or traditional American buttercream for sweeter notes. However, the slight acidity of cream cheese traditionally balances the sweetness and cocoa depth.
- → How should I store leftovers to maintain freshness?
Cover the cake tightly with plastic wrap or store in an airtight container in the refrigerator for up to 4 days. The cream cheese frosting requires refrigeration. Bring slices to room temperature for 15-20 minutes before serving to enjoy the soft, tender texture fully.
- → What if I don't have heart-shaped pans?
Bake in two 9-inch round pans instead. Once cooled and frosted, use a sharp knife to carefully trim the rounds into heart shapes, or simply present as round layers with the chocolate silhouette centered. Alternatively, bake one square layer and cut hearts from it after frosting.